Inspired by the awesome Global Mobilization Texture Templates released by Vertexmacht, and requests from the Arma 3 modder community, we are providing templates to help modders retexture Prairie Fire DLC Assets as mods.
Download Texture Templates HERE
Need help? Read the guide below and feel free to ask questions on our discussions:
SOGPF Discord #modding-chat
SOGPF Community Forum Modding Thread
Prairie Fire vehicles are configured and textured using hiddenSelections. This means that you can edit textures of the vehicles without having to edit the model itself and instead can create a simple mod config to swap the hiddenSelectionsTextures or use an in-game script (setObjectTexture (in Eden Editor) or setObejectTextureGlobal (in multiplayer)) like in the example below.
The main textures used on assets are usually listed in an array in the assets config called "hiddenSelections[]". The array is a list of selections (parts of the model) which have unique textures assigned to each of them. Vehicles usually have 2-3 hiddenSelections, but sometimes they can have a lot more additional decals like nation roundels, license plates or tail numbers etc. The hiddenSelections config for the OH-6A Cayuse is shown below.
hiddenSelections[] =
{
"camo1", //exterior [array slot 0]
//decals
"d_body_l", // [1]
"d_body_r", // [2]
"d_tail_l", // [3]
"d_tail_r", // [4]
"d_engine_l", // [5]
"d_engine_r", // [6]
"d_nose", // [7]
"d_tailring" // [8]
};
hiddenSelectionsTextures[] =
{
"\vn\air_f_vietnam\oh6a\data\vn_b_air_oh6_ext_01_co.paa",//exterior
//decals
"\a3\data_f\clear_empty.paa", //body l
"\a3\data_f\clear_empty.paa", //body r
"\vn\air_f_vietnam\oh6a\decals\vn_air_oh6a_tail_02_01_ca.paa", //tail l
"\vn\air_f_vietnam\oh6a\decals\vn_air_oh6a_tail_02_01_ca.paa", //tail r
"\a3\data_f\clear_empty.paa", //eng l
"\a3\data_f\clear_empty.paa", //eng r
"\a3\data_f\clear_empty.paa", //nose
"\a3\data_f\clear_empty.paa" //tail ring
};
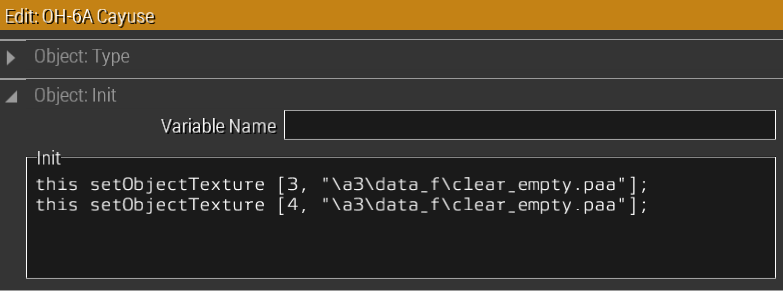
You can make a small mod (a pbo) that sets out a new or patched class of vehicle with your new textures listed in the hiddenSelectionsTextures array above, or you can just change the init line in the Eden editor to path to your custom texture, and save your mission. For example, to hide the Army tail decals on the OH-6A the following init line for the vehicle swaps hiddenSelections array slots 3 and 4 with a transparent texture. You can use a similar approach to replace the selections texture with your custom one.
this setObjectTexture [3, "\a3\data_f\clear_empty.paa"];
this setObjectTexture [4, "\a3\data_f\clear_empty.paa"];
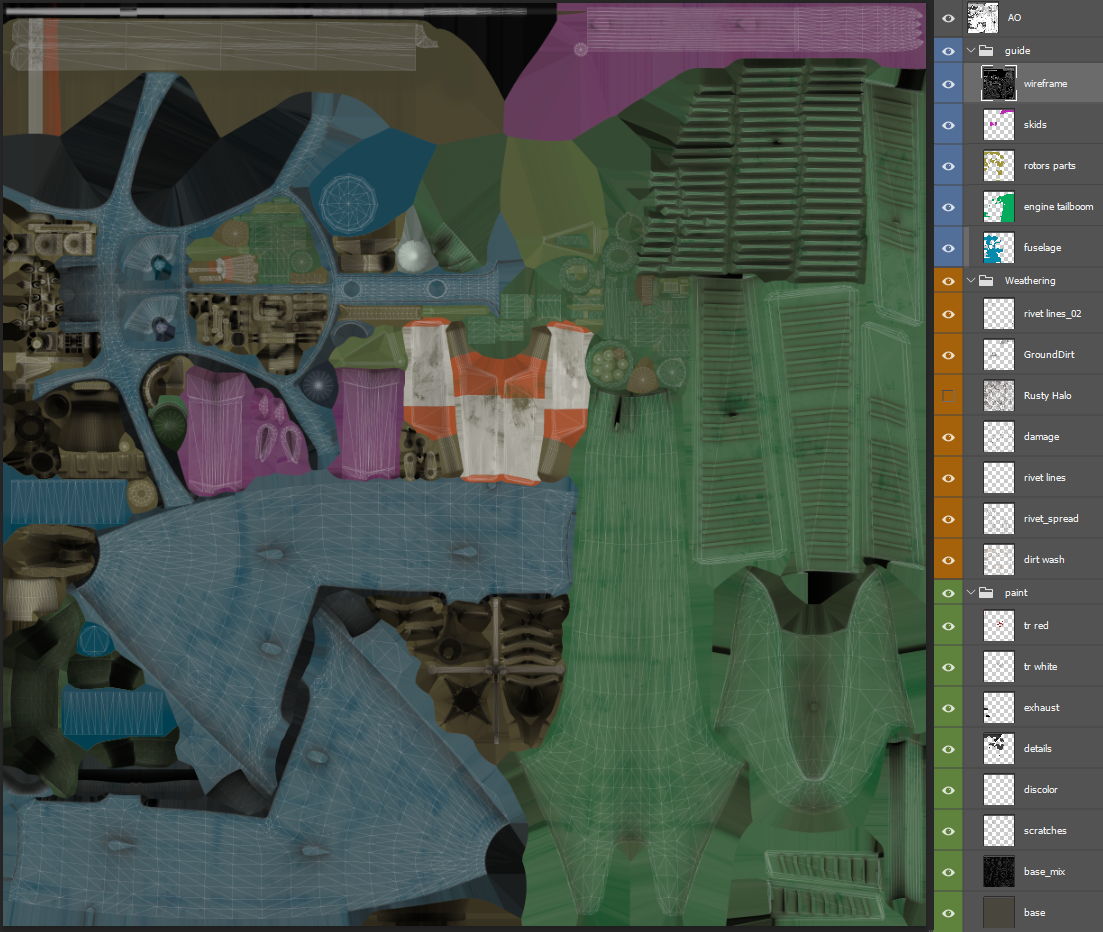
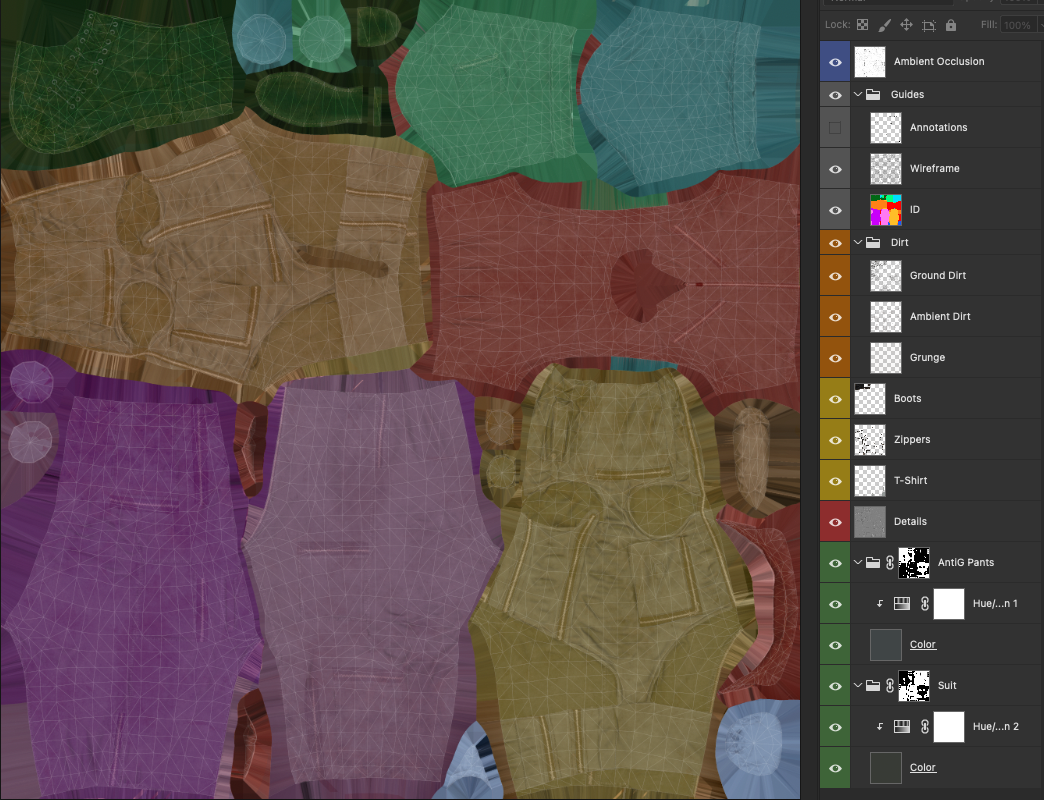
Texture Templates are provided in PSD format (opened in Photoshop) indicated in helpful colour coded and wire frame guides to assist you through identifying and making your work look as good as possible. There are various layers that allow you to edit the base colour or the dirt separately.
Changelog:
1-OCT-2021 - Initial Release.
Contains texture templates for the following assets:
Uniforms: BLUFOR, OPFOR and CIV
Helicopters: AH-1G, CH-34, OH-6A, UH-1C, UH-1D
Planes: F-4
Tanks: Type 63
Cars: M151